




Contact number:
+86-15692113403
How to Insert and Remove Dr.Clear Aligners
 Date:2020-10-03 20:36:10
 Author:
 Views:9960
In daily life, many patients are unfamiliar with how to wear clear aligners due to a lack of orthodontic knowledge, which can cause confusion during treatment. Today, Dr.Clear Aligner will discuss how to insert and remove Dr.Clear aligners, as well as important precautions to keep in mind during wear.
1. Inserting the Clear Aligner
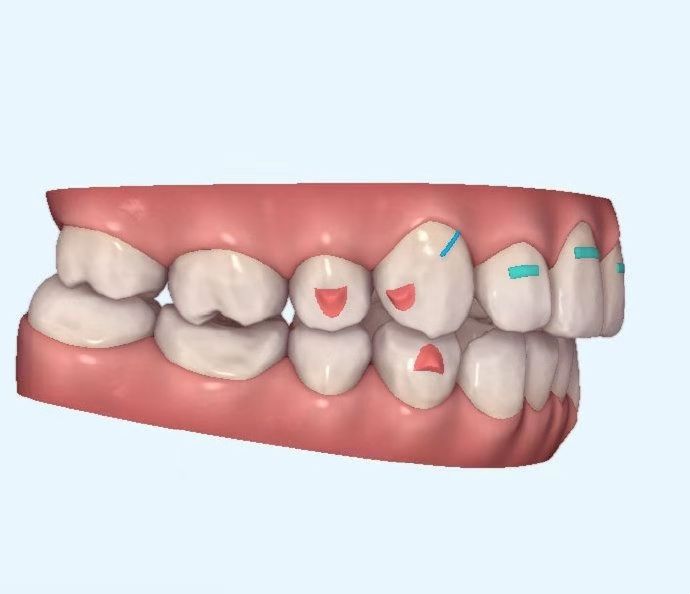
You may start with either the upper or lower aligner. However, it is recommended to follow the principle of seating the front teeth first, then the back teeth. Gently press the aligner into place over the front teeth, then use your fingertips to press down sequentially over the molar areas on both sides to seat the back teeth.
Once the aligner is fully seated, use the dedicated Chewie from Dr.Clear. Hold one end of the chewie in your hand, place the other end in your mouth, and bite down gently. Move from one side of your mouth to the other, ensuring every tooth is firmly seated. It is recommended to repeat this action each time you insert the aligner to ensure a snug fit. For patients with crowded teeth, crossbite, or other complex cases, Dr.Clear Aligner advises following your doctor's instructions for insertion.
2. Removing the Clear Aligner
You may start with either the upper or lower aligner. Similarly, follow the principle of removing the back teeth first, then the front teeth. Begin at the lingual side of the terminal molar on one side, and use your fingertip to gently disengage the aligner from the teeth. Once the aligner is disengaged from both molar areas, slowly move your fingers to gently lift the aligner off the teeth.
If the aligner feels tight during removal, slowly repeat the above steps. Do not force it off, as this may damage the aligner. You may also use the dedicated removal tool from Dr.Clear to assist with removal. As with insertion, for patients with crowded teeth, crossbite, or other complex cases, it is recommended to follow your doctor's instructions for removal.
Precautions During Clear Aligner Wear
1. Regular Follow-up Visits
First, it is important to note that, just like traditional braces, wearing Dr.Clear aligners requires regular follow-up visits. Typically, your dentist will recommend a fixed schedule for follow-up appointments based on your individual condition to monitor your progress. If you experience any issues during treatment, such as a loose attachment or a broken elastic, contact your treating doctor promptly for a follow-up visit to avoid compromising the treatment outcome.
2. Follow Your Doctor's Instructions
The success of orthodontic treatment largely depends on patient compliance with the prescribed instructions. Generally, aligners should be worn for at least 20 hours per day. Failure to do so may affect the treatment progress and results. Insufficient wear time can prevent teeth from moving as expected, and skipping regular follow-up visits may lead to irreversible damage to the teeth. Therefore, it is essential to strictly follow your doctor's instructions while wearing clear aligners.
With all this information, we hope you now have a comprehensive understanding of how to insert and remove Dr.Clear aligners and the related precautions. For more questions about the clear aligner process or wearing clear aligners, please consult the Dr.Clear official website customer service.
Recommended Articles
- Shanghai | Cohort 1 of the Dr.Clear Masterclass on Integrated Early Orthodontic Intervention and Pediatric Dentistry Concludes Successfully
- Dr.Clear Aligner and Korea's Graphy Enter into an Exclusive Strategic Partnership in China
- Dr.Clear Aligner 2025 Mid-Year Review: Defining Future Precision with Chinese Wisdom!
- Wuhan | Dr.Clear Aligner & Hongchang Dental Summer Pediatric Early Orthodontic Treatment Dual-Track Training Program for Clinicians and Patients Concludes Successfully
- Technology for Good: The “Silver Smile · Seedling Dental Care” Community Outreach Initiative Launches
- “Journey Together, Protecting Little Smiles” – Dr. Eggshell Pediatric Dental & Dr.Clear Aligner Study Tour Season 3 Successfully Concluded~
- Shanghai | Dr.Clear GroForce Class II-III Solution Seminar Successfully Concluded!
- Focusing on a Digital Future: Dr.Clear Aligner and Industry Leaders Discuss New Opportunities in Orthodontics
- Henan | Luoyang Danke Children's Dental Digital Children's Whole-Periodic Facial Management Center Officially Established!
- Beijing | Dr.Clear Children's Whole-Period Early Orthodontic Treatment Roadshow and Summit Concluded Successfully